
Playing Plumber: Build Your Own Pipe Lights
The pipe lights added a lot of ambiance to the trailer.
We didn’t set out to build our own light fixtures. In fact, Elsie’s original wall sconces were among her most charming features. A bright light – literally – among a trailer that required a lot of TLC. Which is why it surprised even us when we decided to replace them.
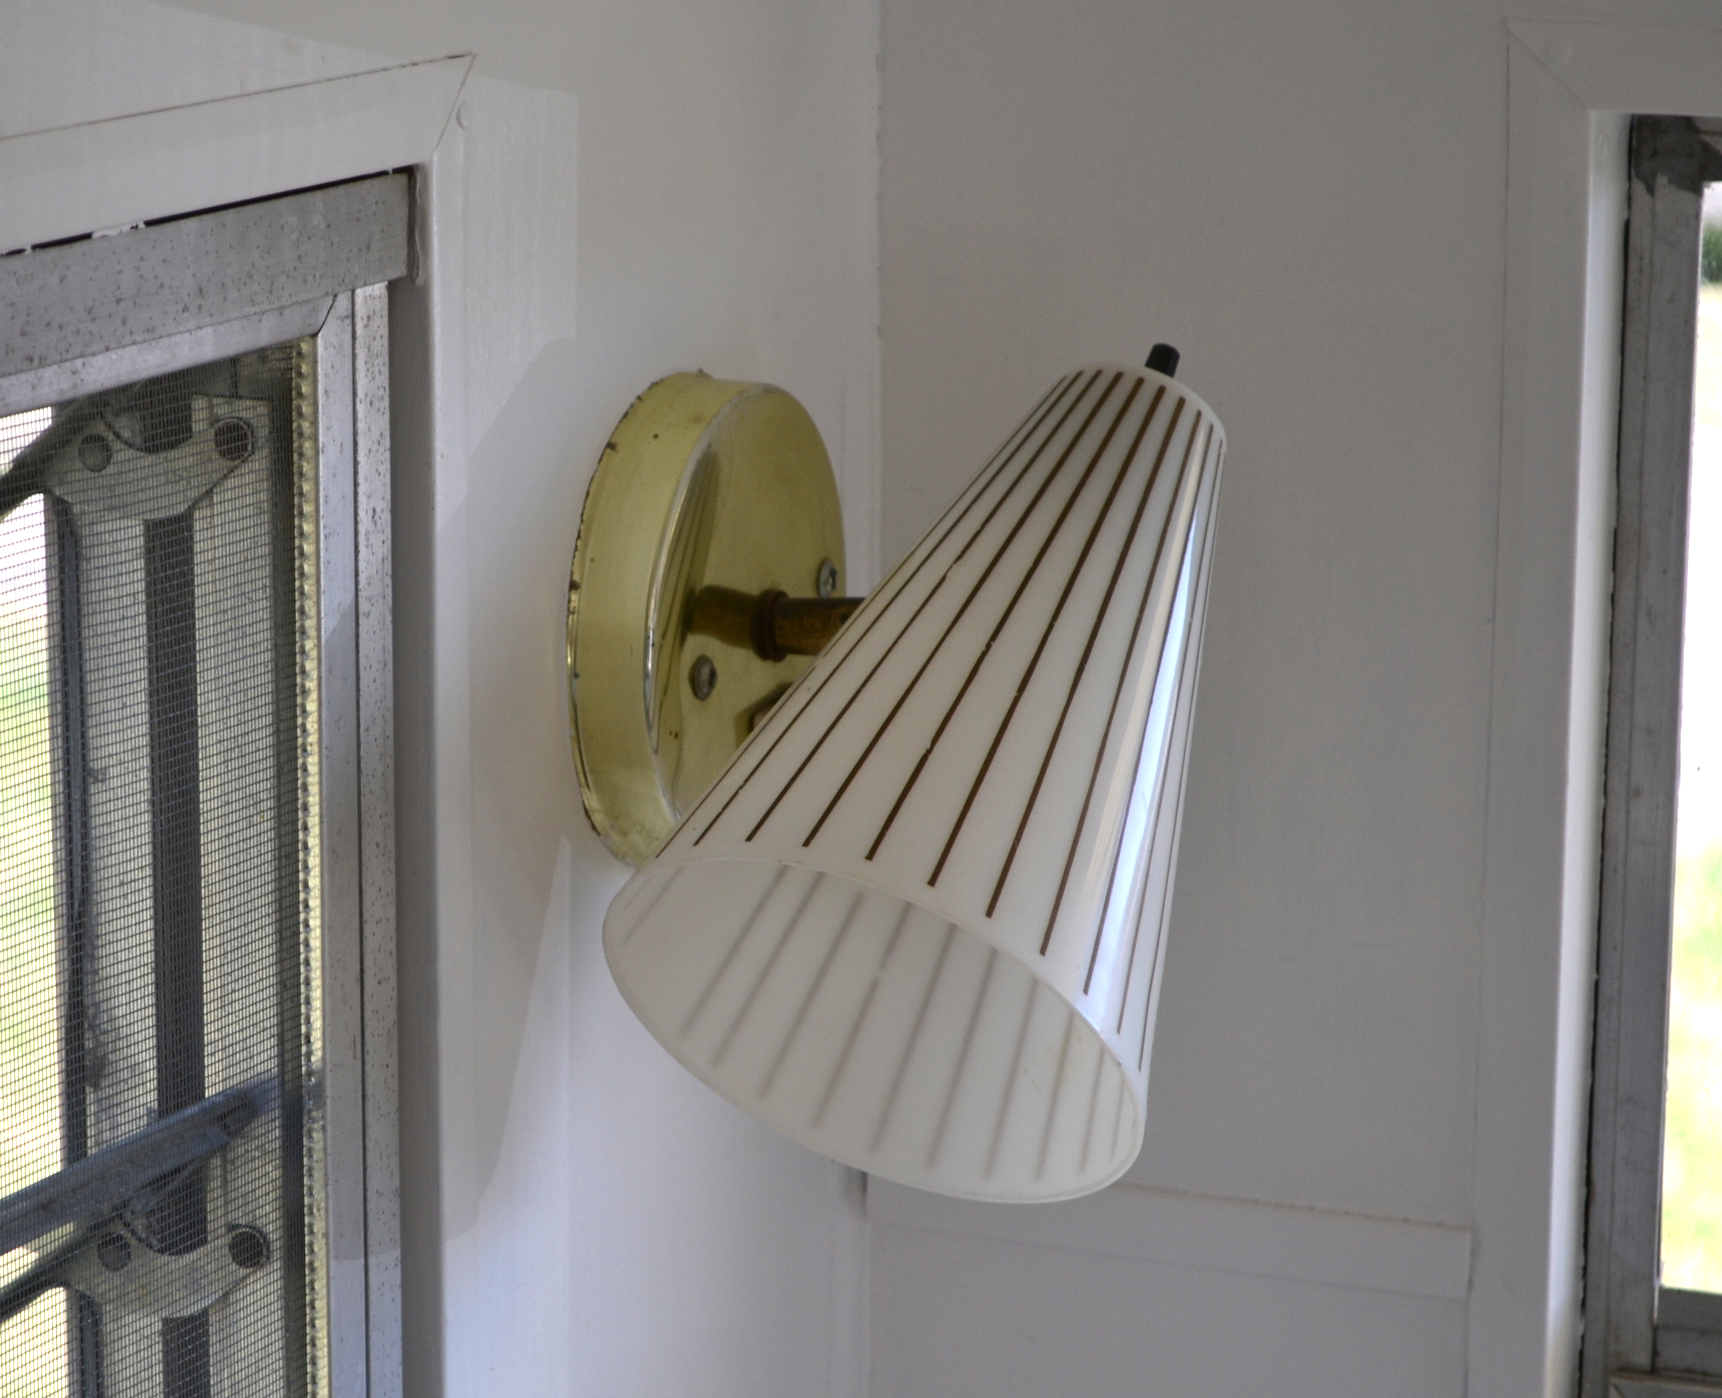
The old sconces. Not bad, but not perfect, either.
The 60s gold sconces simply weren’t jiving with our new wood backsplash and copper room divider and white, white walls. I would have settled for simply purchasing a new set, and in fact set out on many a Google search for affordable options. After stumbling upon an Etsy seller that was making plumbing pipe lights, Carson decided that for the cost of purchasing and shipping those, we could easily make them ourselves.
Sure enough, another Google search turned up a lot of DIYs that guide you through how to make your own. We started there, but quickly found them unhelpful. The size and placement of our sconces meant we’d have to build from scratch. And honestly, that’s how we’d recommend you do it, too. Which is why I’m going to outline what we bought and the steps we took and let you fill in the gaps for your own project.
1. Go shopping. We had a few ideas about what we needed, but truth be told this was the hardest part. We ended up not having some of the pieces “the Internet” recommended at our local big box stores. So we basically spent a couple hours standing in the plumbing aisle screwing pieces together and talking through design options.
Here’s what we landed on for piping fixtures:
- Two ½” black floor flanges
- Two ½ x 3/8” black 90 degree reducing elbows
- Two ½ x 3” black nipples

From left to right: light socket, brass hex bushing, lamp nipple, elbow, pipe nipple, flange, glass shade holder.
We also had to buy the essential lighting pieces:
- Two 1/8” threaded lamp nipples
- Two turn-knob lamp sockets
- Two Edison bulbs
We also needed one more very hard to find piece: a connector that would attach the lamp nipple (inside the lamp socket) to the piping elbow. We inevitably found it at Home Depot. It was this:
- 3/8” x 1/8” brass hex bushing
2. Assemble first. After we had all the right pieces, we brought them home and re-assembled them inside Jerry’s workshop. This part was simple because we’d done it before in the store. And because you’re using piping, threading the wires through is not complicated.
3. Attach it. This step proved a little tricky for us. Keep in mind, we were working with an area that had wall sconces previously. The plus: we already had the wiring in place. The minus: there was an old mounting bracket left behind that created some problems.

The old base. This "mounting bracket" was the reason we couldn't mount the wood piece direct to the wall.
Originally we planned to simply cover the old hole with some leftover wood scraps. A few years back, we built a feeding dish for Costello from an old wood crate that was about a century old. We had to cut circular holes in the top so that Costello’s metal food dishes would sit on top, and being the recyclers we are, we’d hung on to those pieces for a long time thinking they’d come in handy someday. Today was the day.
We ended up still using those pieces, but more as decorative trim than a mounting base. Here’s why:

The original wood piece that we wanted to mount direct to the wall.

We ended up using the wood mostly as a trim piece after we couldn't mount it to the wall.
Originally we were going to mount the pipe light right onto the wood and then onto the wall. But the mounting base we mentioned earlier made it so the wood base would not be flush with the wall if we mounted over it. It would stick out like 1/16”. It didn’t look great.
Another problem was the outlet. The old sconces had a single outlet in them that we wanted to retain because outlets are scarce in the trailer. However, the previous outlets had a clip on them that kept them secure in the old metal bases. That clip did not work with our wood bases. Sure, we could cut out a hole the size of the outlet and make it look okay. But with nothing to keep the outlet in place, we’d likely rip it out of the wall anytime we tried to unplug something.

Attaching the outlet wires to the original wires was pretty easy.
Luckily Jerry had purchased a few 3 ¼” Glass Shade Holder Kits with a polarized outlet at Menards during the week just in case we needed it for this project. And we did. This mounting base already had a single outlet in it (woo!) and would cover the previous hole / bracket left from the old sconce bases. It was a serendipitous fit.
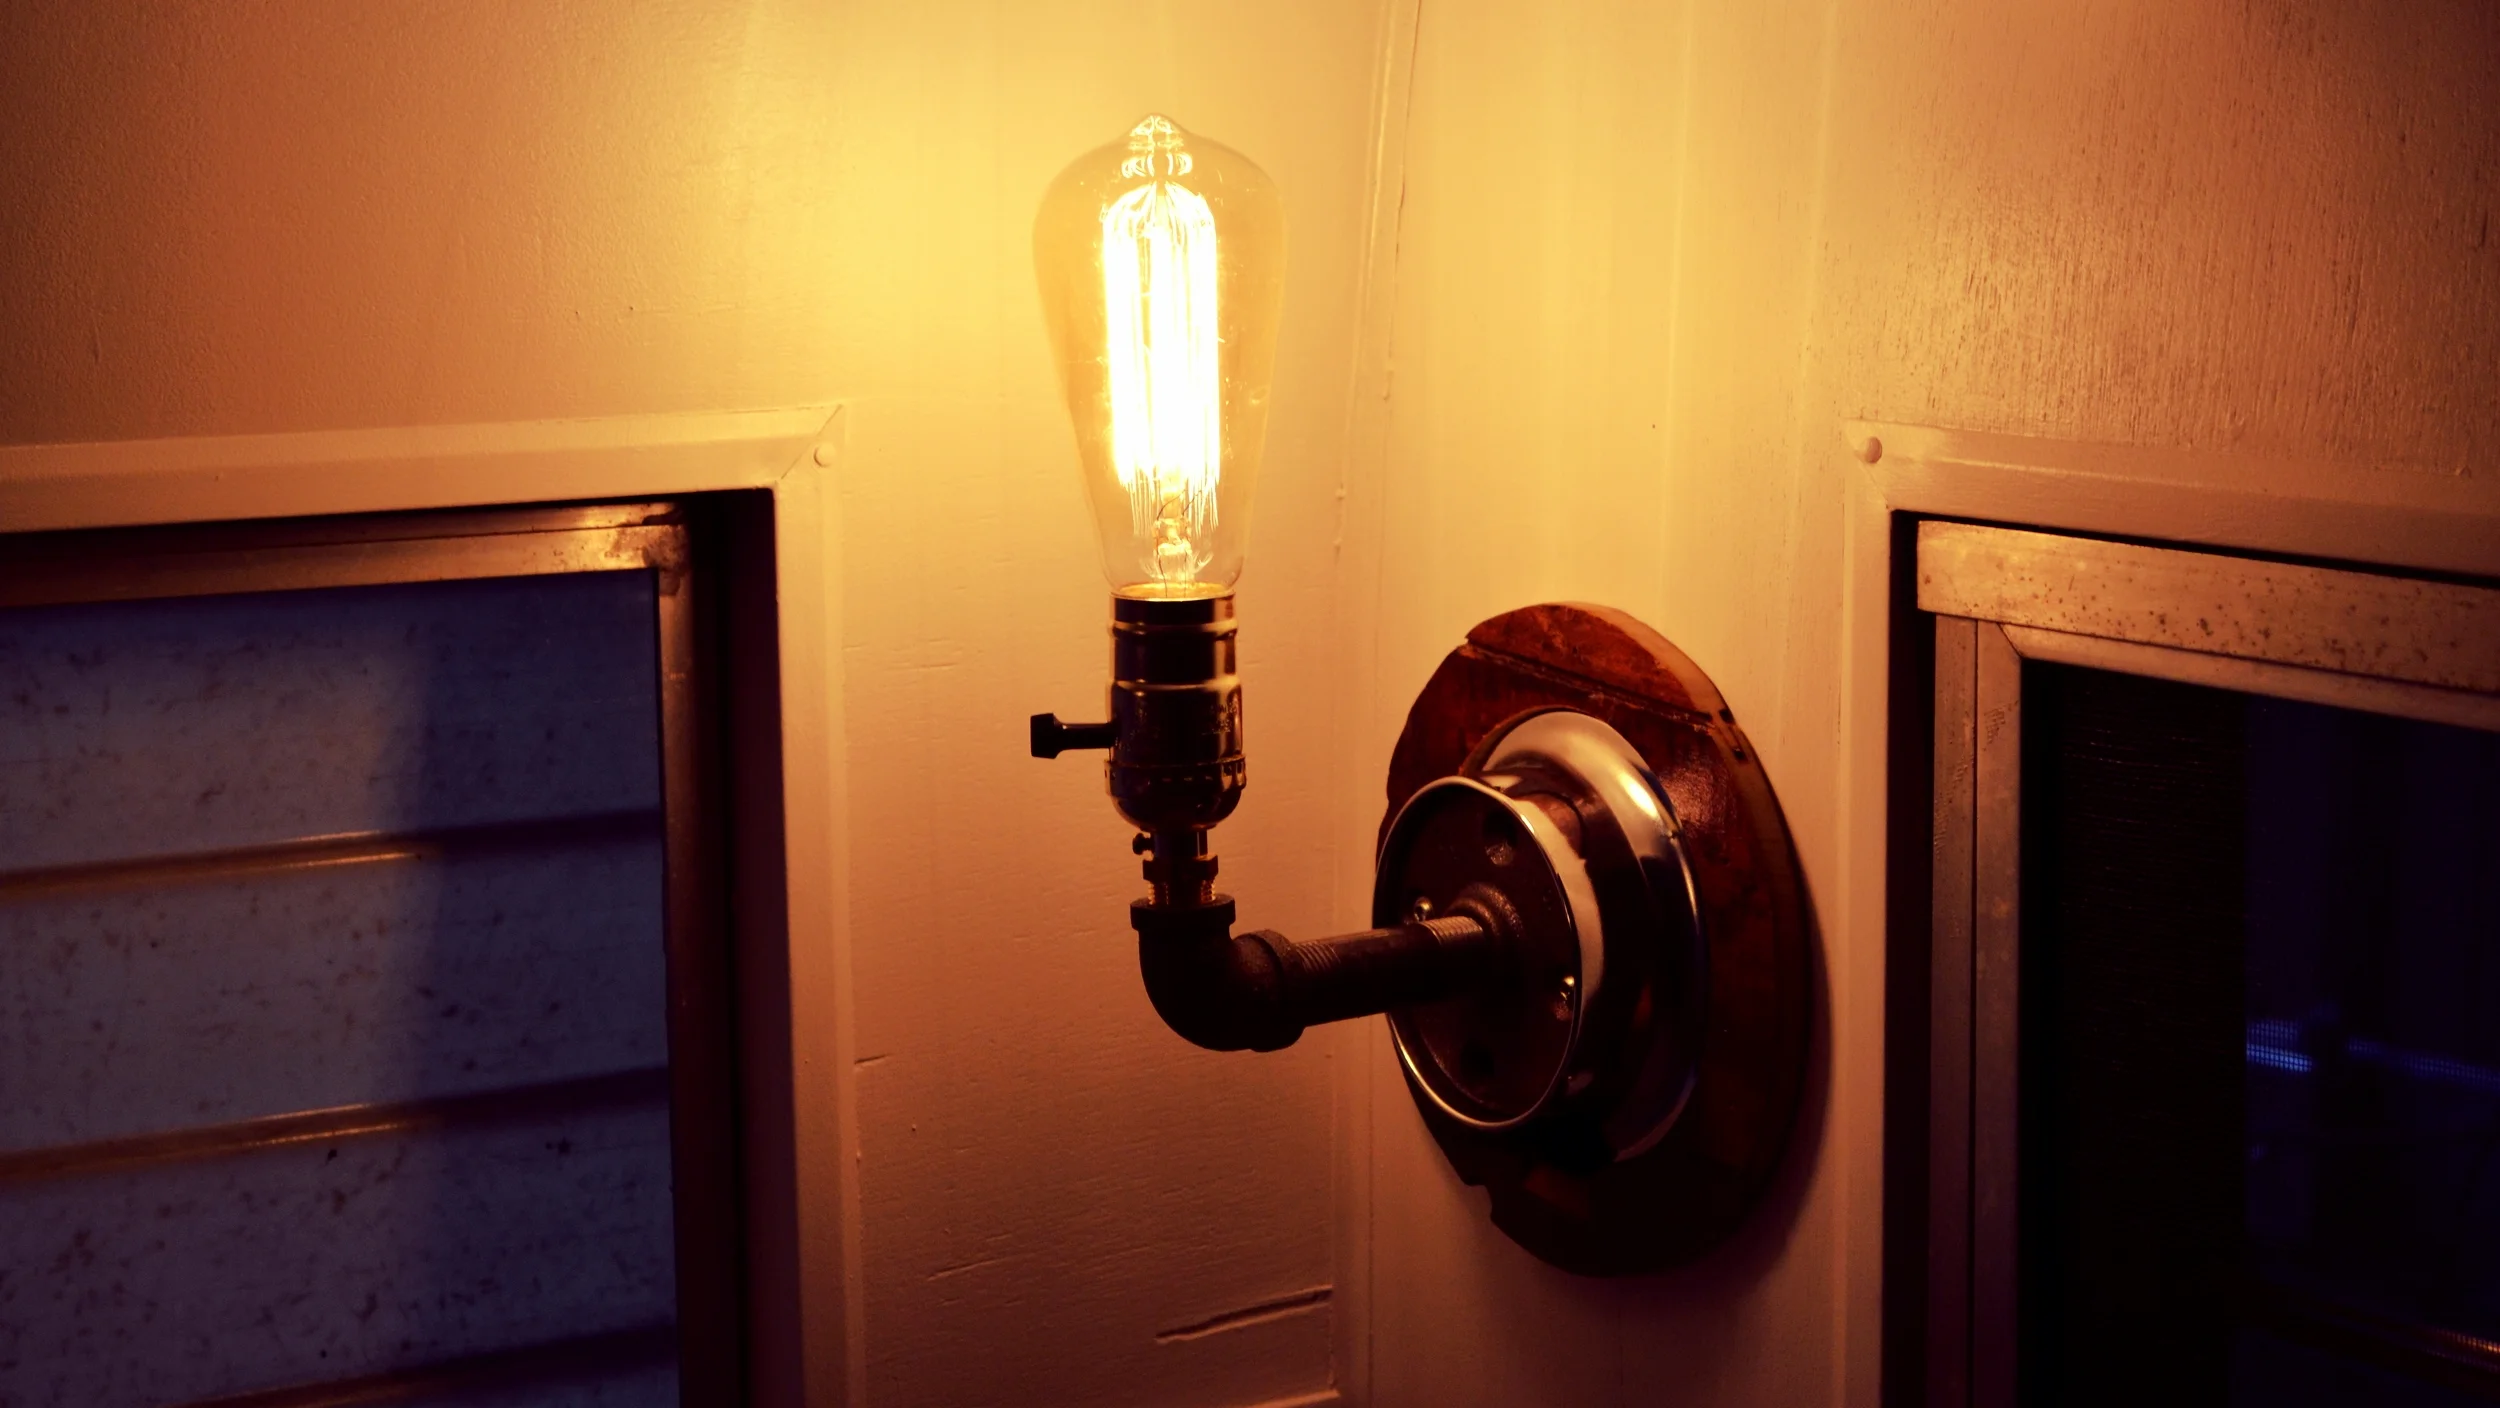
We did one last bit of assembly: we attached the pipe light flange to the metal base. The flange fit perfectly just inside the edges of the base and then we screwed it into place with two screws.
4. Electrical work. We connected outlet lines from the new metal base (which came with wiring) to the original lines. Tested it. It worked!
Now, technically steps 3 and 4 are reversed. But I wanted to explain how we landed on the different base.
As you see in the final product, we basically made the wooden circles into trim pieces and glued them around the base. Did we need to do this? No. But, we wanted to carry over some of the wood to the light fixtures. And they looked good together. So, we did it.

The finished product: a self-made pipe light!

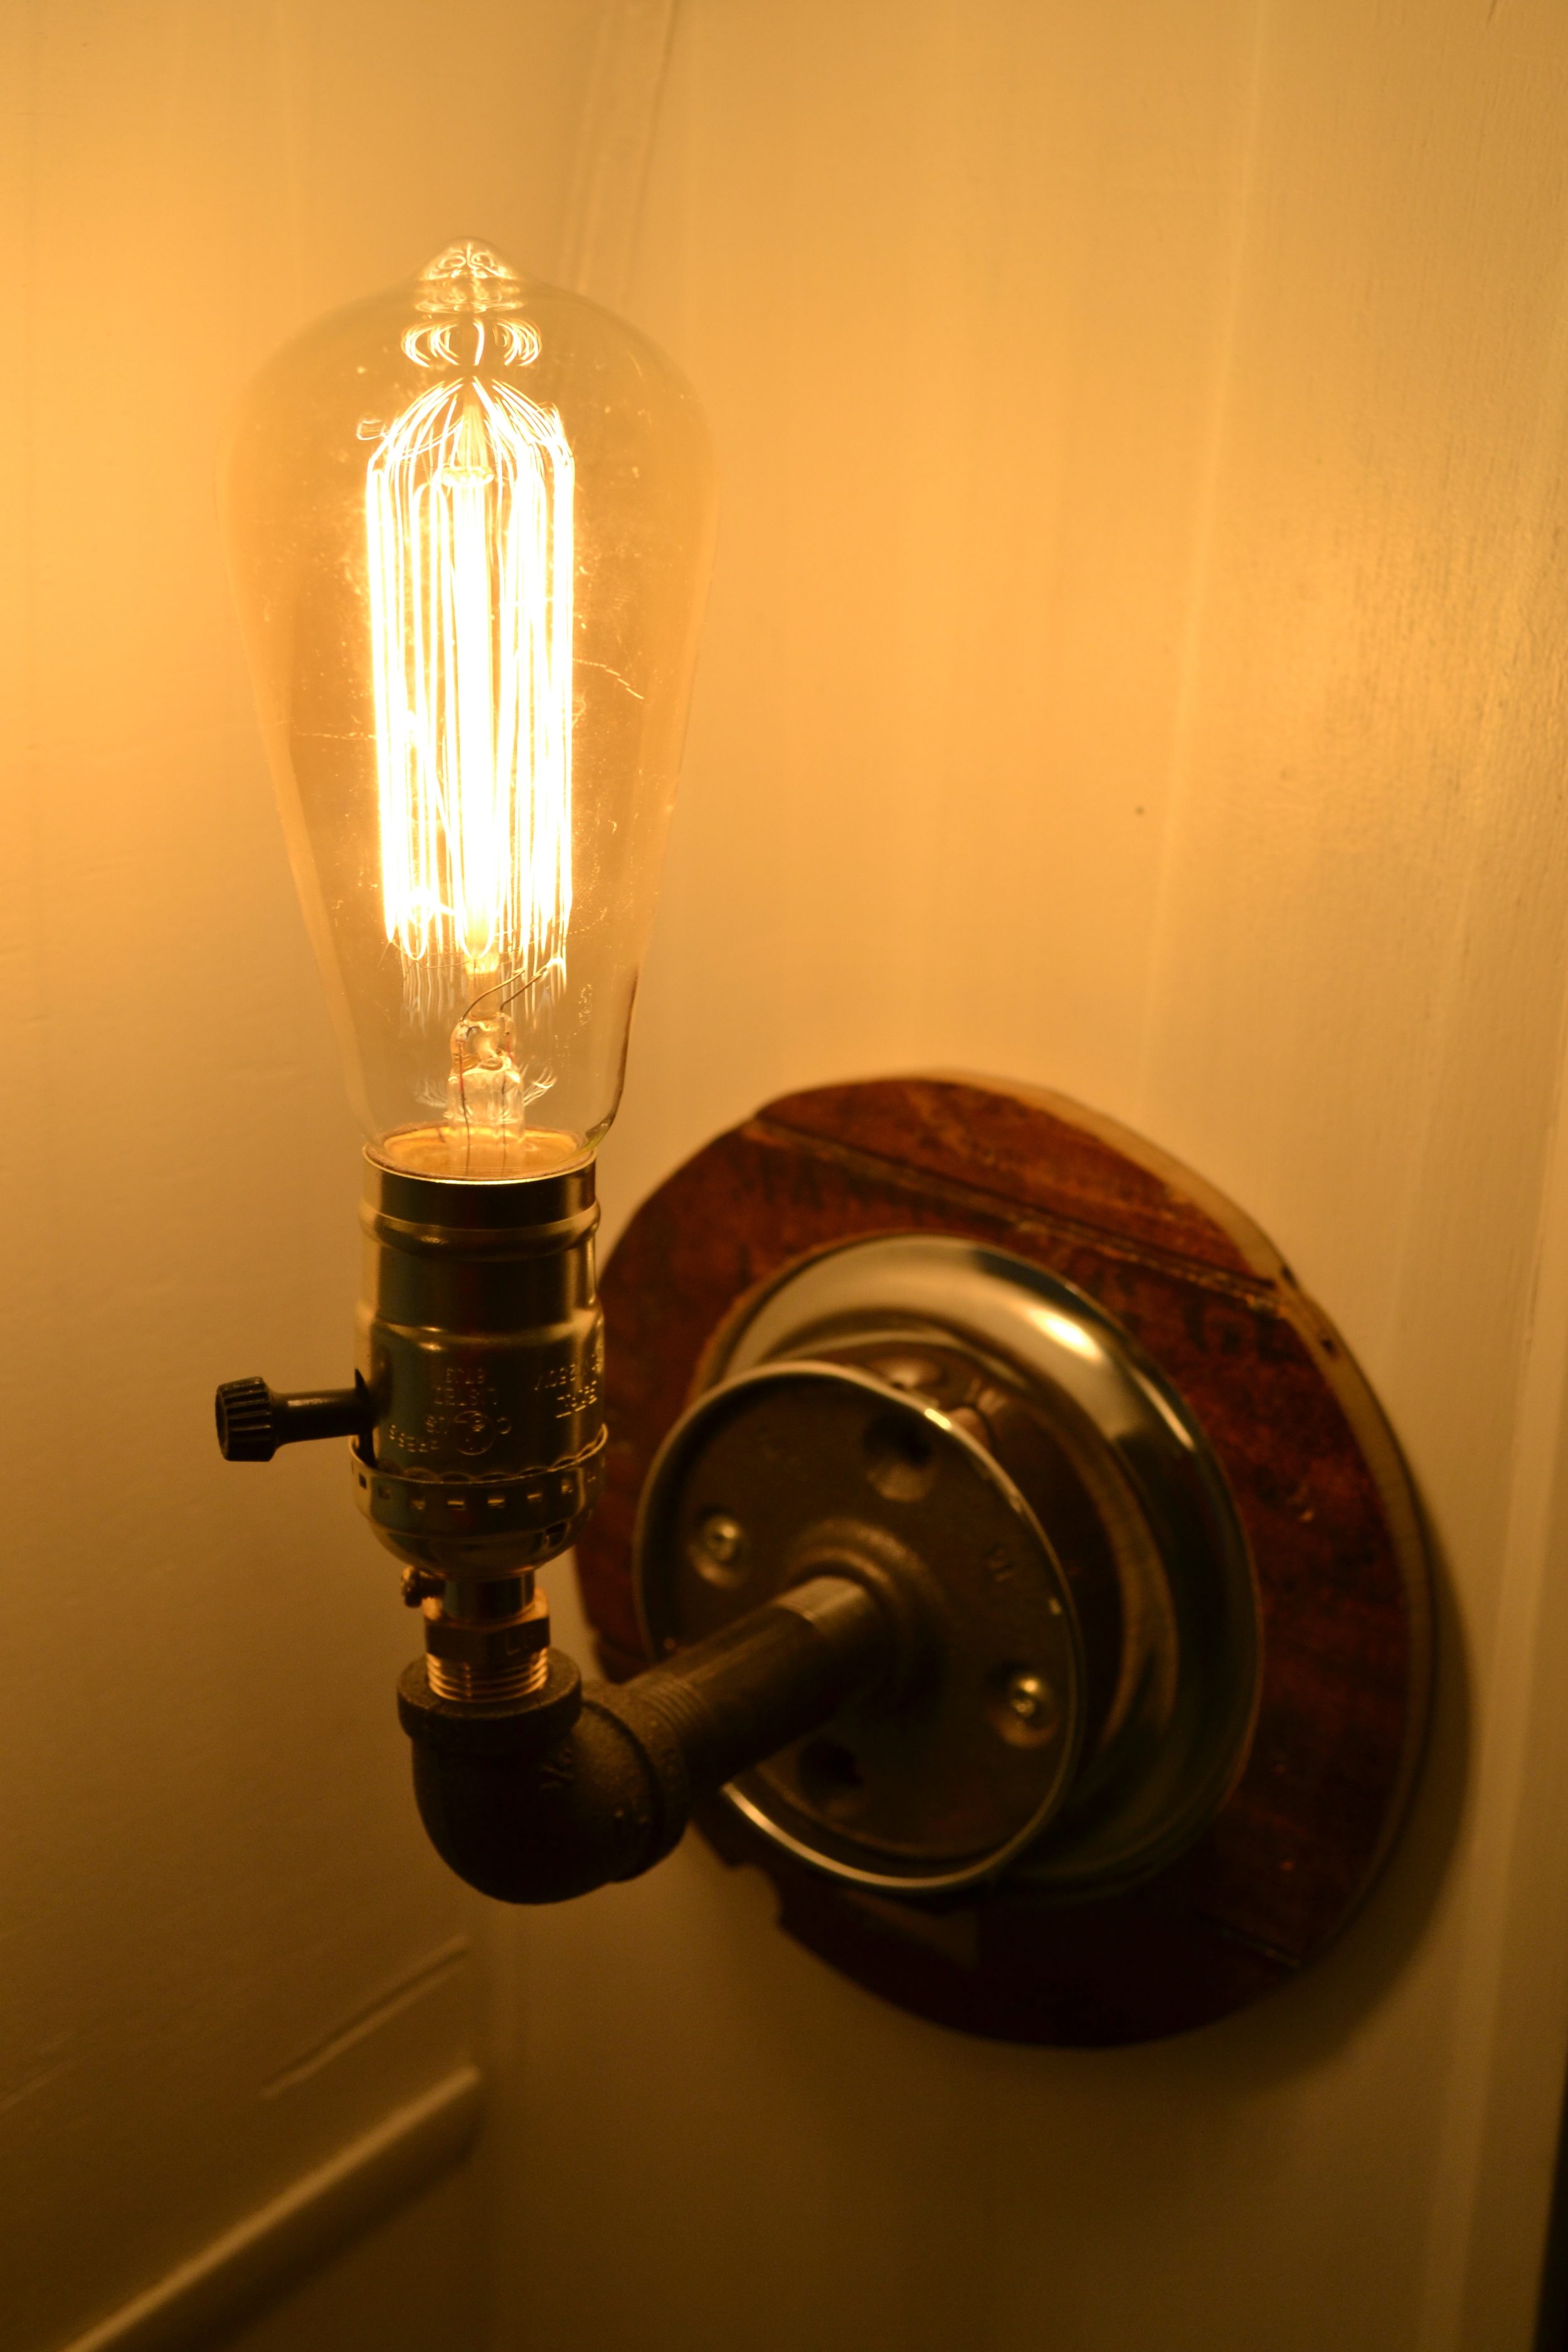
Edison bulb in our finished pipe light.

As for the other lights in the trailer, they were much less complicated. We bought a vintage-looking 6 ¾” flush mount light at Lowe’s to cover the single bulb under the work station cabinets. It had to be low profile and work with just a single bulb, which was kind of tricky to find. But once we did, it was crazy cheap. Only $10.88!
Half the lights in the trailer are battery-powered and half are electric. We didn’t mess with a lot of the battery-powered lights because the new RV fixtures for them really aren’t more attractive than what we already have. There was one exception. The overhead ceiling light actually works on a battery, but the previous owners had a center mount screw light cover over it. These aren’t hard to find, so we located one at EcoStore in Lincoln. Ecostore is kind of a like a ReStore, except local. We love it. Anywho, we got this new (old) light cover there.
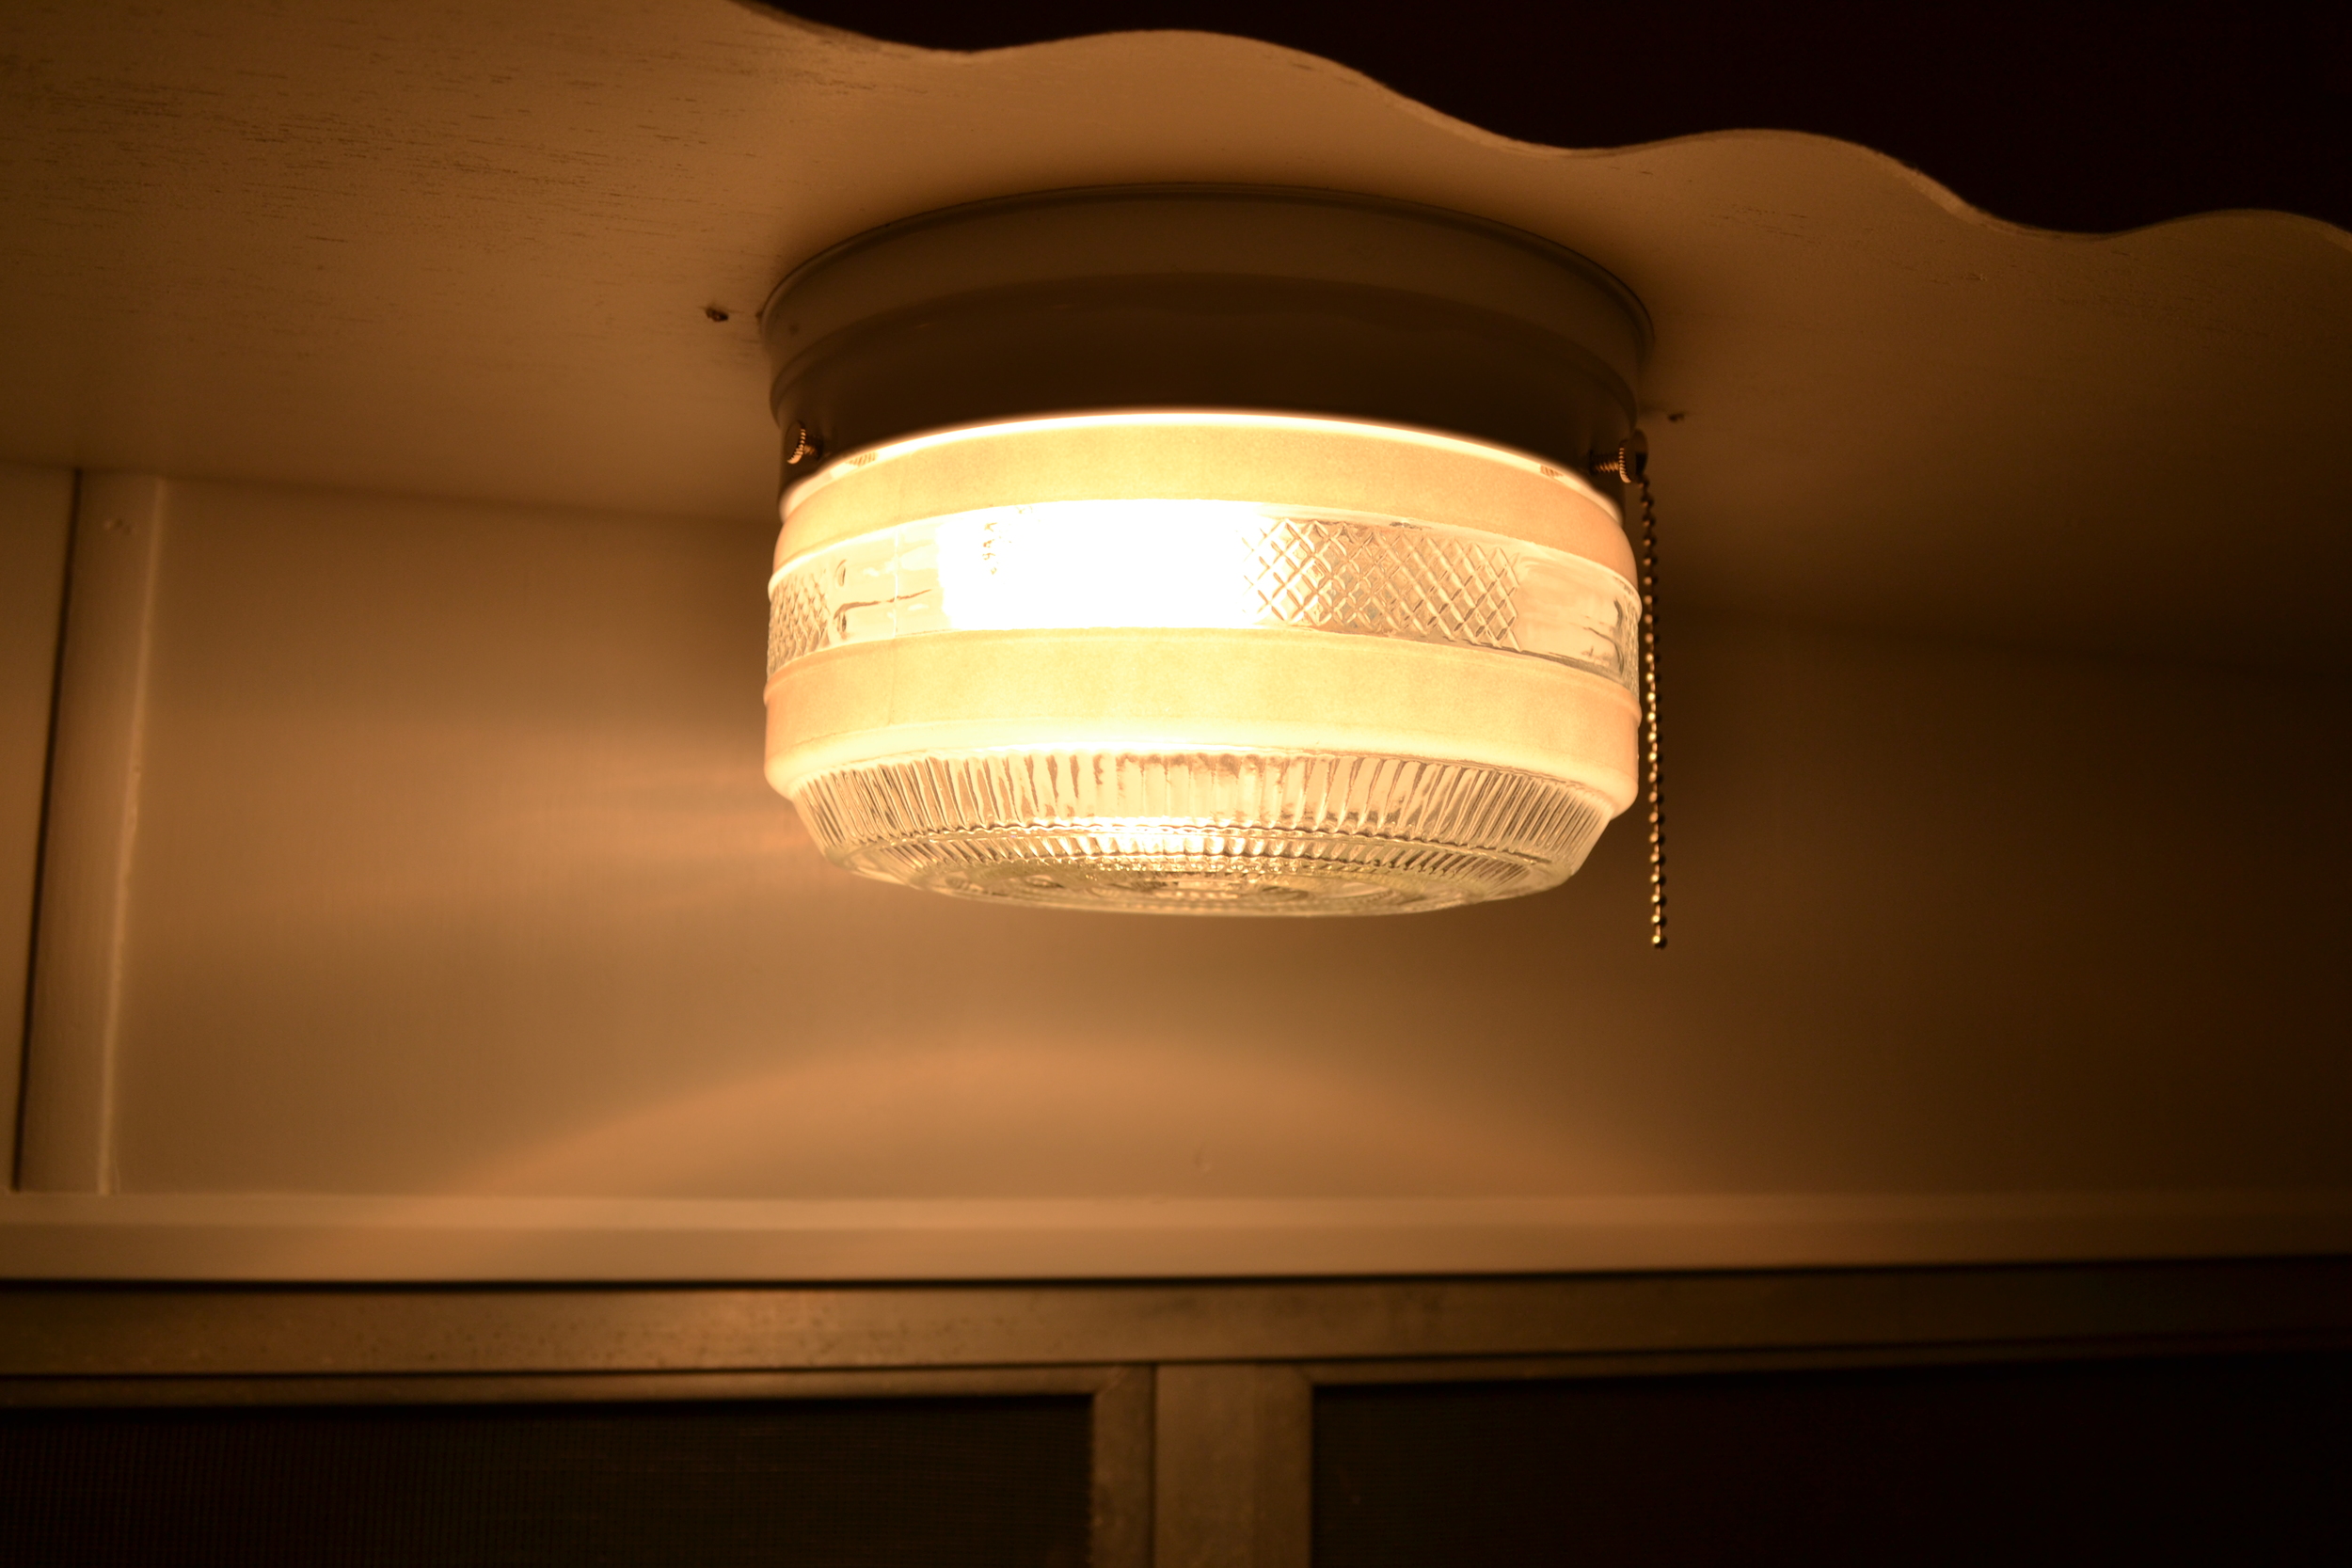
Glass flush mount light near our work station.
Overall, the lighting in Elsie has worked wonderfully. And everything works and looks great, too.